
Install the app
How to install the app on iOS
Follow along with the video below to see how to install our site as a web app on your home screen.
Note: This feature may not be available in some browsers.
-
FluTrackers.com Inc. does not provide medical advice. Information on this web site is collected from various internet resources, and the FluTrackers board of directors makes no warranty to the safety, efficacy, correctness or completeness of the information posted on this site by any author or poster. The information collated here is for instructional and/or discussion purposes only and is NOT intended to diagnose or treat any disease, illness, or other medical condition. Every individual reader or poster should seek advice from their personal physician/healthcare practitioner before considering or using any interventions that are discussed on this website. By continuing to access this website you agree to consult your personal physican before using any interventions posted on this website, and you agree to hold harmless FluTrackers.com Inc., the board of directors, the members, and all authors and posters for any effects from use of any medication, supplement, vitamin or other substance, device, intervention, etc. mentioned in posts on this website, or other internet venues referenced in posts on this website. -
We are not asking for any donations. Do not donate to any entity who says they are raising funds for us.
- Home
- Forums
- Forum
- How to Prepare for a Pandemic and How to Cope
- Personal, Family, & Professional Emergency Prep
- 2006 - 2019 Personal, Family, & Professional Emerg
- Water
You are using an out of date browser. It may not display this or other websites correctly.
You should upgrade or use an alternative browser.
You should upgrade or use an alternative browser.
Water and Chlorine
- Thread starter no eye deer
- Start date
no eye deer
Member
CreativeOne
Active member
Re: Water and Chlorine
These are some sites in regards to pumping your own water after modifying your well. If you have a small community, or rather shallow well, this might be an option for a group of people in your community to try.
http://www.simplepump.com/prod_specs.html
http://www.survivalunlimited.com/handwaterpumpshallow.htm
An infomational site from the State of Minnisota
http://www.health.state.mn.us/divs/eh/cwi/
Remember - Fresh drinking water will be a concern during a long term power outage or during a power outage with a quarantine restriction.
These are some sites in regards to pumping your own water after modifying your well. If you have a small community, or rather shallow well, this might be an option for a group of people in your community to try.
http://www.simplepump.com/prod_specs.html
http://www.survivalunlimited.com/handwaterpumpshallow.htm
An infomational site from the State of Minnisota
http://www.health.state.mn.us/divs/eh/cwi/
Remember - Fresh drinking water will be a concern during a long term power outage or during a power outage with a quarantine restriction.
Re: Water and Chlorine
I got this information from the first link posted; (anx8.pdf )
>>Calcium hypochlorite powder or granules 70% (HTH)
7 grams or ? tablespoon per 1 litre of water
7 grams or ? tablespoon per 10 litres of water<<
there appears to be an error in the formula or is it just me?
how can 1/2 tablespoon be used in both 1 litre as well as 10 litres?
Since I am storing HTH rather then liquid I am looking for information.
Thanks...
Brook
I got this information from the first link posted; (anx8.pdf )
>>Calcium hypochlorite powder or granules 70% (HTH)
7 grams or ? tablespoon per 1 litre of water
7 grams or ? tablespoon per 10 litres of water<<
there appears to be an error in the formula or is it just me?
how can 1/2 tablespoon be used in both 1 litre as well as 10 litres?
Since I am storing HTH rather then liquid I am looking for information.
Thanks...
Brook
Re: Water and Chlorine
Here is a link for water storage and purification:
http://www.majorsurplusnsurvival.com/tip water storage.htm
Here is a link for water storage and purification:
http://www.majorsurplusnsurvival.com/tip water storage.htm

Sally Furniss
Well-known member
Re: Water and Chlorine

http://www.epa.gov/ogwdw000/faq/emerg.html
Emergency Disinfection of Drinking Water
In times of extreme crisis, local health departments may urge consumers to use more caution or to follow additional measures. If local public health department information differs from this advice, the local information should prevail.
When the home water supply is interrupted by natural or other forms of disaster, you can obtain limited amounts of water by draining your hot water tank or melting ice cubes. In most cases, well water is the preferred source of drinking water. If it is not available and river or lake water must be used, avoid sources containing floating material and water with a dark color or an odor.
When emergency disinfection is necessary, examine the physical condition of the water. Disinfectants are less effective in cloudy water. Filter murky or colored water through clean cloths or allow it to settle, and draw off the clean water for disinfection. Water prepared for disinfection should be stored only in clean, tightly covered, containers, not subject to corrosion.
There are two general methods by which small quantities of water can be effectively disinfected. One method is boiling. It is the most positive method by which water can be made bacterially safe to drink. Another method is chemical treatment. If applied with care, certain chemicals will make most water free from harmful or pathogenic organisms.
METHODS OF EMERGENCY DISINFECTION
Hand Hygiene in Emergency Situations
Boiling: Vigorous boiling for one minute will kill any disease-causing microorganisms present in water (at altitudes above one mile, boil for three minutes). The flat taste of boiled water can be improved by pouring it back and forth from one container to another (called aeration), by allowing it to stand for a few hours, or by adding a small pinch of salt for each quart of water boiled.
Chemical treatment: When boiling is not practical, chemical disinfection should be used. The two chemicals commonly used are chlorine and iodine. Chlorine and iodine are somewhat effective in protecting against exposure to Giardia, but may not be effective in controlling Cryptosporidium. Therefore, use iodine or chlorine only to disinfect well water (as opposed to surface water sources such as rivers, lakes, and springs), because well water is unlikely to contain these disease causing organisms. Chlorine is generally more effective than iodine in controlling Giardia, and both disinfectants work much better in warmer water.
CHLORINE METHODS
Chlorine Bleach: When boiling is not practical, chemical disinfection should be used. Common household bleach contains a chlorine compound that will disinfect water. The procedure to be followed is usually written on the label. When the necessary procedure is not given, find the percentage of available chlorine on the label and use the information in the following tabulation as a guide.
Available Chlorine1%, Drops per Quart of Clear Water 10
Available Chlorine 4-6%, Drops per Quart of Clear Water 2
Available Chlorine 7-10%, Drops per Quart of Clear Water 1
(If strength is unknown, add ten drops per quart of water. Double amount of chlorine for cloudy or colored water or water that is extremely cold.)
The treated water should be mixed thoroughly and allowed to stand, preferably covered, for 30 minutes. The water should have a slight chlorine odor; if not, repeat the dosage and allow the water to stand for an additional 15 minutes. If the treated water has too strong a chlorine taste, it can be made more pleasing by allowing the water to stand exposed to the air for a few hours or by pouring it from one clean container to another several times.
Granular Calcium Hypochlorite. Add and dissolve one heaping teaspoon of high-test granular calcium hypochlorite (approximately 1/4 ounce) for each two gallons of water. The mixture will produce a stock chlorine solution of approximately 500 mg/L, since the calcium hypochlorite has an available chlorine equal to 70 percent of its weight. To disinfect water, add the chlorine solution in the ratio of one part of chlorine solution to each 100 parts of water to be treated. This is roughly equal to adding 1 pint (16 oz.) of stock chlorine to each 12.5 gallons of water to be disinfected. To remove any objectionable chlorine odor, aerate the water as described above.
Chlorine Tablets.Chlorine tablets containing the necessary dosage for drinking water disinfection can be purchased in a commercially prepared form. These tablets are available from drug and sporting goods stores and should be used as stated in the instructions. When instructions are not available, use one tablet for each quart of water to be purified.
TINCTURE OF IODINE
Common household iodine from the medicine chest or first aid kit may be used to disinfect water. Add five drops of 2 percent United States Pharmacopeia (U.S.P.) Tincture of iodine to each quart of clear water. For cloudy water add ten drops and let the solution stand for at least 30 minutes.
IODINE TABLETS
Commercially prepared iodine tablets containing the necessary dosage for drinking water disinfection can be purchased at drug and sporting goods stores. They should be used as stated. When instructions are not available, use one tablet for each quart of water to be purified.
WATER TO BE USED FOR DRINKING, COOKING, MAKING ANY PREPARED DRINK, OR BRUSHING THE TEETH SHOULD BE PROPERLY DISINFECTED.
http://www.epa.gov/ogwdw000/faq/emerg.html
Emergency Disinfection of Drinking Water
In times of extreme crisis, local health departments may urge consumers to use more caution or to follow additional measures. If local public health department information differs from this advice, the local information should prevail.
When the home water supply is interrupted by natural or other forms of disaster, you can obtain limited amounts of water by draining your hot water tank or melting ice cubes. In most cases, well water is the preferred source of drinking water. If it is not available and river or lake water must be used, avoid sources containing floating material and water with a dark color or an odor.
When emergency disinfection is necessary, examine the physical condition of the water. Disinfectants are less effective in cloudy water. Filter murky or colored water through clean cloths or allow it to settle, and draw off the clean water for disinfection. Water prepared for disinfection should be stored only in clean, tightly covered, containers, not subject to corrosion.
There are two general methods by which small quantities of water can be effectively disinfected. One method is boiling. It is the most positive method by which water can be made bacterially safe to drink. Another method is chemical treatment. If applied with care, certain chemicals will make most water free from harmful or pathogenic organisms.
METHODS OF EMERGENCY DISINFECTION
Hand Hygiene in Emergency Situations
Boiling: Vigorous boiling for one minute will kill any disease-causing microorganisms present in water (at altitudes above one mile, boil for three minutes). The flat taste of boiled water can be improved by pouring it back and forth from one container to another (called aeration), by allowing it to stand for a few hours, or by adding a small pinch of salt for each quart of water boiled.
Chemical treatment: When boiling is not practical, chemical disinfection should be used. The two chemicals commonly used are chlorine and iodine. Chlorine and iodine are somewhat effective in protecting against exposure to Giardia, but may not be effective in controlling Cryptosporidium. Therefore, use iodine or chlorine only to disinfect well water (as opposed to surface water sources such as rivers, lakes, and springs), because well water is unlikely to contain these disease causing organisms. Chlorine is generally more effective than iodine in controlling Giardia, and both disinfectants work much better in warmer water.
CHLORINE METHODS
Chlorine Bleach: When boiling is not practical, chemical disinfection should be used. Common household bleach contains a chlorine compound that will disinfect water. The procedure to be followed is usually written on the label. When the necessary procedure is not given, find the percentage of available chlorine on the label and use the information in the following tabulation as a guide.
Available Chlorine1%, Drops per Quart of Clear Water 10
Available Chlorine 4-6%, Drops per Quart of Clear Water 2
Available Chlorine 7-10%, Drops per Quart of Clear Water 1
(If strength is unknown, add ten drops per quart of water. Double amount of chlorine for cloudy or colored water or water that is extremely cold.)
The treated water should be mixed thoroughly and allowed to stand, preferably covered, for 30 minutes. The water should have a slight chlorine odor; if not, repeat the dosage and allow the water to stand for an additional 15 minutes. If the treated water has too strong a chlorine taste, it can be made more pleasing by allowing the water to stand exposed to the air for a few hours or by pouring it from one clean container to another several times.
Granular Calcium Hypochlorite. Add and dissolve one heaping teaspoon of high-test granular calcium hypochlorite (approximately 1/4 ounce) for each two gallons of water. The mixture will produce a stock chlorine solution of approximately 500 mg/L, since the calcium hypochlorite has an available chlorine equal to 70 percent of its weight. To disinfect water, add the chlorine solution in the ratio of one part of chlorine solution to each 100 parts of water to be treated. This is roughly equal to adding 1 pint (16 oz.) of stock chlorine to each 12.5 gallons of water to be disinfected. To remove any objectionable chlorine odor, aerate the water as described above.
Chlorine Tablets.Chlorine tablets containing the necessary dosage for drinking water disinfection can be purchased in a commercially prepared form. These tablets are available from drug and sporting goods stores and should be used as stated in the instructions. When instructions are not available, use one tablet for each quart of water to be purified.
TINCTURE OF IODINE
Common household iodine from the medicine chest or first aid kit may be used to disinfect water. Add five drops of 2 percent United States Pharmacopeia (U.S.P.) Tincture of iodine to each quart of clear water. For cloudy water add ten drops and let the solution stand for at least 30 minutes.
IODINE TABLETS
Commercially prepared iodine tablets containing the necessary dosage for drinking water disinfection can be purchased at drug and sporting goods stores. They should be used as stated. When instructions are not available, use one tablet for each quart of water to be purified.
WATER TO BE USED FOR DRINKING, COOKING, MAKING ANY PREPARED DRINK, OR BRUSHING THE TEETH SHOULD BE PROPERLY DISINFECTED.
Binkerbear
Well-known member
Re: Water and Chlorine
Does anyone recommend a way of doing a basic filtering on creek water just to get out the obvious sediments that would clog up filters ? I am specifically talking about a basic quick way of pouring water from one container into another with some kind of simple filter in the second container. (The real purification process would be done after this step.)
The linked documents, etc. say to pour it through clean cloths which seems difficult, slow, and messy.
My only thought would be some kind of large metal mesh filter much like the filter that comes with coffee makers only larger. I think that that type (coffee maker type that is too small) would work but it seems like it would be slow and difficult if you were trying to clean up a couple of gallons of water.
Does anyone recommend a way of doing a basic filtering on creek water just to get out the obvious sediments that would clog up filters ? I am specifically talking about a basic quick way of pouring water from one container into another with some kind of simple filter in the second container. (The real purification process would be done after this step.)
The linked documents, etc. say to pour it through clean cloths which seems difficult, slow, and messy.
My only thought would be some kind of large metal mesh filter much like the filter that comes with coffee makers only larger. I think that that type (coffee maker type that is too small) would work but it seems like it would be slow and difficult if you were trying to clean up a couple of gallons of water.
Sally Furniss
Well-known member
Re: Water and Chlorine
How about letting the water sit in the bucket for a while to give the sediment time to settle out. Leaves and sticks floating on the surface could be skimmmed off with a flat sieve.
How about letting the water sit in the bucket for a while to give the sediment time to settle out. Leaves and sticks floating on the surface could be skimmmed off with a flat sieve.
no eye deer
Member
Re: Water and Chlorine
Brook,There are 2 columns in the table. One is for a 10% solution and the other is for a 1% solution. Regular bleach is between 5-6%.Brook said:I got this information from the first link posted; (anx8.pdf )
>>Calcium hypochlorite powder or granules 70% (HTH)
7 grams or ? tablespoon per 1 litre of water
7 grams or ? tablespoon per 10 litres of water<<
there appears to be an error in the formula or is it just me?
how can 1/2 tablespoon be used in both 1 litre as well as 10 litres?
Since I am storing HTH rather then liquid I am looking for information.
Thanks...
Brook

LMonty
Advisory Board, Administrator, In Memoriam
Re: Water and Chlorine
FT thread on "How to Find Water and Keep It Safe" with link to FAQ of the same name, and ensuing discussion and tips.
The FAQ has beginner to advanced information on water. This is an excellent resource FAQ, and those printing out information (the internet may not always be available) will find it an excellent addition to their prep resource notebook. I highly recommend it.
FT thread on "How to Find Water and Keep It Safe" with link to FAQ of the same name, and ensuing discussion and tips.
The FAQ has beginner to advanced information on water. This is an excellent resource FAQ, and those printing out information (the internet may not always be available) will find it an excellent addition to their prep resource notebook. I highly recommend it.
Sally Furniss
Well-known member
Re: Water and Chlorine
<hr style="color: rgb(204, 204, 204);" size="1"> <!-- / icon and title --> <!-- message --> Biologically Active Sand Filter
http://www.friendswhocare.ca/I%20-%2...e%20Manual.doc
Installation, Operation, and Maintenance Manual
BioSand Water Filter
Humanitarian Service
Last Revised: March 2005
INSTALLATION
For a BioSand filter to operate properly, it must be installed and commissioned correctly. Make a checklist and use it to ensure that you have everything you’ll need before you head out to install a filter. A filter maintenance guide (such as a laminated sheet) should be left with the users of each filter. This guide could be attached to the filter or placed on a wall adjacent to the filter.
TRANSPORTING THE FILTER
Always consider the safety issues related to moving the filter. There can be injuries due to strains of the back, arms, and knees. Watch out for crushing or pinching of fingers and toes under or behind the filter. Keep in mind the size of the filter (12” x 12” x 36”) and its weight (160 Lbs - plus an additional 100 Lbs of media). It can be difficult and awkward to move this large object.
Some ways to move the filter include:
• Cart – animal or human powered
• Car, truck, or boat
• Carrying slings – wide, heavy canvas straps placed over the shoulder to lift a heavy object
• Dolly – a frame or rack with small wheels, strong enough to carry the weight
• Rollers – metal or wooden, round pieces that can be used to move the filter short distances
POSITIONING THE FILTER
It is important to determine a good location for the filter. Locating the filter inside the home is important not only for filter effectiveness, but also for the convenience of the user. If the users can access the filter easily, they will be more likely to use and maintain it. Once filled with media, the filter should not be moved.
The filter should be placed:
• In a protected location away from sunlight, wind, rain, animals, and children
• Preferably inside the home
• Near the food preparation or kitchen area (depending on the space and layout of the house)
• Where it can and will be used and maintained easily
• On level ground
• So that water can easily be poured in the top
Tip: You may have to add a step if the users are short, so that they don’t have to lift the bucket of unfiltered water above shoulder height.
• Where there’s adequate room for hauling and pouring pails of water into the filter, and storing the filtered water
PLACE THE MEDIA
Estimated Time: 10 minutes
Tools Needed:
• Approximately 3 litres of washed _” gravel
• Approximately 3 _ litres of washed _” gravel
• Approximately 25 litres of washed sand
• A stick (approximately 40” long, 1” x 2” is preferred)
• Measuring tape
• At least 2 buckets of water
1. Ensure that the drain hole (the standpipe opening at the bottom inside of the filter) is clear and unobstructed (i.e. is not covered by concrete and is not plugged by any debris.) The flow rate through the copper pipe without any media in the filter should be 1 litre / 25 seconds.
Tip: This step should have been done when the filter was removed from the mold, however, double check now before you get too far into the installation.
2. Ensure that the inside of the filter has been cleaned out (including dirt, dust, and oil from the mold).
3. Place a stick inside the filter so that it’s touching the bottom of the filter.
4. Draw a horizontal line on the stick where it meets the top edge of the filter.
5. Measure and mark a line 2” down from the first line.
6. Fill the filter half full of water.
Note: The media must always be added with water already in the filter to prevent pockets of air from being trapped within the media.
7. Add approximately 2” of underdrain (_”) gravel to the filter.
8. Level out the gravel, and use the stick to measure how much has been added. Place the bottom of the stick on the gravel. When the 2nd line on the stick lines up with the top edge of the filter, you have added enough gravel.
Note: Ensure that the gravel covers the drain hole near the bottom of the filter.
9. Measure and mark a line 2” down from the second line.
10. Add approximately 2” of support layer (_”) gravel to the filter.
11. Level out the gravel, and use the stick to measure how much has been added. Again, place the bottom of the stick on the gravel. When the 3rd line on the stick lines up with the top edge of the filter, you have added enough gravel.
12. Quickly pour approximately 20 litres of washed sand to the filter (ensuring that there is always water above the surface of the sand).
Note: A random distribution of different sand grain sizes is critical to the proper operation of the filter. Adding the sand quickly maintains the random distribution by not allowing the different sizes of grains to settle into layers.
13. Continue adding smaller quantities of sand until water starts to pour out of the spout. (Again, make sure that there is always water above the surface of the sand. Add water if necessary.)
14. When the water stops pouring out of the spout, the water level is equalized.
Note: The water level in the filter is determined by the spout. Due to a siphoning effect, the water will stop coming out of the filter when the water is at the same level as the bottom of the spout.
15. Smooth out the sand and then measure the depth of the water above the sand bed.
16. If the water depth is less than 2”: remove sand until the depth is 2” (with the sand surface level and the water level equalized).
17. If the water depth is more than 2”: repeat steps 13 to 17 until the water depth is 2”.
18. Smooth out the surface of the sand so that it’s as level as possible.
FLUSH THE FILTER
Estimated Time: 1 hour
Tools Needed:
• Diffuser
• 40 – 80 litres of water
1. Place the diffuser plate on the ledge inside the filter. Ensure that it fits snugly.
Note: The diffuser must not be touching the surface of the water at its resting level. That would greatly reduce the amount of oxygen in the standing water layer, affecting the survival of the schmutzdecke.
2. Place a receiving container under the spout. The water that it captures can be reused.
3. Pour the cleanest available water into the filter (turbidity < 30 NTU).
4. Observe the water coming out of the spout.
5. Continue adding water to the filter until the water coming out of the spout is clear. This may take 40-80 litres (10-20 Gallons)
Note: If the outlet water doesn’t run clear after 100 litres (25 Gallons), the gravel or sand was too dirty to start with. It is probably easiest to take the media out, wash it in pails, and then place it back in the filter.
TEST FLOW RATE
Estimated Time: 5 minutes
Tools Needed:
• Measuring container with 1 litre mark
• Stopwatch
• Bucket
1. Fill the filter to the top with water.
2. Place your measuring container under the spout to collect the outlet water.
3. Measure the time it takes to fill the container to the 1 litre mark. It should take between 50 – 80 seconds.
4. If it takes longer than 80 seconds, the flow rate is too slow.
• The filter will still work, but it may clog faster and more often, requiring more maintenance
• If it takes too long to get a pail of water, the user may not like the filter and may use untreated water
• The flow rate can be improved by “swirling” the top layer of the sand and then scooping out the dirty water
• If a few “swirl & dumps” do not improve the flow rate substantially, the sand is either too fine or too dirty – you will have to rewash the sand
5. If it takes less than 50 seconds to fill the measuring container to 1 litre, the flow rate is too fast.
• The filter may not function effectively
• The media should be replaced with finer media (less washed)
• A less preferable option is to run a considerable amount of water through the filter until the flow rate decreases (due to the capture of finer particles and faster growth of the biolayer)
Note: The flow rate through the filter decreases as the height of the water in the influent reservoir drops. As the water level reaches the diffuser, treated water may only drip out of the filter spout. It can take 40 – 90 minutes for the 20 litres in the reservoir to completely pass through the filter.
DISINFECT THE SPOUT
Estimated Time: 10 minutes
Tools Needed:
• 3’ of garden hose that just fits over the filter spout
• 1 hose clamp (if available)
• Funnel (can be made from the top of a soda or water bottle)
• Bleach solution (1/2 teaspoon bleach to 2 litres of water)
Note: Do NOT pour chlorine bleach into the top of the filter!
1. Place the garden hose over the filter spout.
2. Clamp the hose in place with the hose clamp.
3. Place the funnel on the other end of the garden hose.
4. Hold the funnel higher than the top of the filter, and pour 2 litres of bleach solution into the funnel.
5. Hold in place for 2 minutes.
6. Remove the garden hose and drain the bleach solution
7. Wipe the outside of the spout with a clean, bleach-soaked cloth.
8. Add 20 litres of water to the top of the filter to flush the bleach out. Instruct the user not to use this water for drinking or cooking.
9. Place the lid on the filter.
OPERATION
ESTABLISHING THE BIOLAYER
• The schmutzdecke or biolayer is the key bacteria removing component of the filter
• Without it, the filter removes some contamination through screening of the particles and microorganisms (only 30-70% removal efficiency)
• A good schmutzdecke will remove 90-99% of biological pathogens
• It may take 10 – 20 days to establish the schmutzdecke
• The water from the filter can be used during the first few weeks while the schmutzdecke is being established if a safer water source is not available, but chlorination is recommended at least during this time period
• The schmutzdecke is NOT usually visible – it is not a green slimy coating on top of the sand
DAILY USE
Educate all of the users, including children, on how and why the filter works and on the correct operation and maintenance. Children are frequently the main users of the filter.
• Slowly pour raw (untreated) water into the filter daily (at least 20 litres, twice per day)
• Using the same source of water every day will improve the filter effectiveness
• Use the best source of water (least contaminated) available – the better the raw water is, the better the treated water will be
• Pre-filter or settle raw water if not relatively clear – less than 50 NTU
Tip: A simple test to measure the turbidity is to fill a 2 litre clear plastic soft drink bottle with raw water. Place the bottle on top of large print such as the CAWST logo on this manual. If you can see the logo, the water probably has a turbidity of less than 50 NTU.
• The diffuser must always be in place when pouring water into the filter – never pour water directly onto the sand layer
• The lid should always be kept on the filter
• Use a designated bucket for fetching raw water
• Use a designated safe storage container to hold the treated water which has:
_ a small opening to prevent recontamination due to dipping with cups or hands
_ a tap or spigot
• Place the receiving container as close to the spout as possible (i.e. place it on a block) to reduce dripping noise and prevent recontamination
Note: The dripping noise can be irritating. The closer you place the container to the spout, the less dripping noise there is. A container with a small opening also reduces dripping noise.
• Water must always be allowed to flow freely from the filter – never plug the spout or connect a hose to it
Note: Plugging the spout could increase the water level in the filter, which could kill the biolayer due to lack of oxygen. Putting a hose or other device on the spout can siphon or drain the water in the filter, dropping the water level below the sand layer.
• No food should be stored inside the filter
Note: Some users want to store their food on the diffuser plate because it is a cool location. The water in the top of the filter is contaminated, so it will contaminate the food. Also, the food attracts insects to the filter.
• The treated water should be chlorinated after it passes through the filter to ensure the highest quality of water and to prevent recontamination (1-5 drops/litre or up to 1 teaspoon/gallon)
MAINTENANCE
Once a filter has been built, installed, and is operational, though minimal, there is some key maintenance that is required. The two primary requirements are disinfecting the spout and cleaning the biolayer when the flow rate is insufficient. Follow-up visits to ensure proper use and maintenance of the filters should be built into the hygiene education program.
DISINFECTION
• The spout will become contaminated during normal use via dirty hands, animals, or insects
• Clean the the spout every day with soap and water or a chlorine cleaning solution
• Wash the receiving container every second day with soap and water or a chlorine cleaning solution
• Do NOT pour chlorine bleach into the top of the filter!
• The entire filter should be cleaned regularly (lid, diffuser, outside surfaces)
SWIRL & DUMP
The flow rate through the filter will decrease over time as the schmutzdecke develops and fine particles are trapped in the upper layer of the sand. Users will know when the “swirl & dump” is required because the flow rate will drop to an unacceptable level. The filter is still effectively treating the water at this point; however the length of time that it takes to get a bucket of water may become too long and be inconvenient for the user. Alternately, you can measure the flow rate (as above) and if it is less than 0.3 litres/minute, “swirl & dump” maintenance is required.
1. Remove the lid of the filter.
2. Add 4 litres (1 gallon) of water to the top of the filter.
3. Remove the diffuser.
4. “Swirl” your hand around in the standing water at least 5 times – the water will become dirty. You can insert your fingers up to the first knuckle in the sand layer while “swirling” around across the entire surface area of the sand, but do not mix the surface layer deep into the filter.
5. Scoop out some dirty water with a small container (i.e. a cup or a pop bottle cut in half).
6. Discard the dirty water outside the house in an appropriate location (remember it is contaminated water).
7. Repeat this “swirl and dump” technique until all the water has been dumped out of the filter.
8. Replace the diffuser.
9. Pour 20 litres (5 gallons) of water into the top of the filter.
10. Measure the flow rate (as above).
11. Repeat steps 1 through 10 until the flow rate is acceptable (close to 1 litre/minute).
12. Wash your hands with soap and clean water - you have been handling contaminated water.
FOLLOW UP VISITS
Follow up with the users on a regular basis to ensure that the filter is being used properly. The first follow up visit should be during the first two weeks of use and then every 1-2 months thereafter. During follow up visits, ensure that the filter is being operated and maintained as described above. The following general checks can be made at any time by the users, a community health worker, or a filter technician that is active in the area:
• Check that the filter is in an appropriate location (indoors, protected from the weather, animals, and insects) and is level
• Look for drips of water or wet spots under the filter, which indicate a leak in the concrete box
• Check that the lid is tight fitting and clean on the inside and outside
• Make sure the diffuser is clean and is sitting properly on the concrete lip
• Make sure the holes in the diffuser are not plugged – periodic cleaning may be needed
• Check that the surface of the sand is smooth and level (use a small straight object to smooth the sand ONLY if necessary)
• Make sure the surface of the sand is 2” (5cm) below the water level.
Note: the sand may settle over time and more will have to be added. Add (or remove) sand if the standing water depth is not 2”.
#12, 2916 – 5th Ave N.E.
Calgary, Alberta, Canada T2A 6K4
Telephone: (403) 243-3285
Fax: (403) 243-6199
Email: cawst@cawst.org
Website: www.cawst.org
<!-- / message --> <!-- controls -->

---------------------------------------------------------------------------------------------------------------------------------------------------------------
http://www.nationalterroralert.com/safewater/
Emergency Water Storage
Having an ample supply of safe, clean water is a top priority in an emergency. A normally active person needs to drink at least two quarts of water each day. Hot environments can double that amount. Children, nursing mothers and ill people will need even more. You will also need water for food preparation and hygiene. Store a total of at least one gallon per person, per day. You should store at least a two-week supply of water for each member of your family. If supplies run low, never ration water. Drink the amount you need today, and try to find more for tomorrow. You can minimize the amount of water your body needs by reducing activity and staying cool.
Amount of Water to Store
Whereas a quart of water or other fluid daily will sustain life, according to the Department of Defense and the Office of Civil Defense, it is recommended that a gallon of water per day per person be stored for food preparation and drinking. A gallon provides added comfort and accommodates increased fluid needs at higher altitudes or warm climates. An additional one-half to 1 gallon per day is recommended for bathing and hygiene, and to wash dishes. How much water should I store? The rule of thumb is to store at least one gallon per person per day for at least 3 days (for earthquake preparedness). That’s 2 quarts for drinking and 2 quarts for food preparation and sanitation. A family of four should store a minimum of 12 gallons of water. Personally, I recommend at least a 10 day supply of water and a 30 day supply if it all possible. Use the following guidelines when storing water: 1. Store drinking water in carefully cleaned, non-corrosive, tightly covered containers. 2. Store containers in a cool dark place. DO NOT store in direct sunlight. Polyethylene plastics (prepackaged milk and water bottles) are somewhat permeable to hydrocarbon vapors. Keep away from stored gasoline, kerosene, pesticides, or similar substances. 3. Stored tap water should be rotated every 6 months. Prepackaged bottled water should be rotated once a year. Check the pull date on the container. Be sure it didn’t sit on the store’s shelf for a year before you purchased it. Self Serve Bottled Water should be rotated once a year, as long as the water treatment process includes ozonation. 4. Rotate your stored water with the water you use on a regular basis. This practice helps insure you don’t have water stored longer than one year.
Containers That Can be Used for Water Storage
Food-grade plastic or glass containers are suitable for storing water. One-, three- and five-gallon water containers can be purchased from most outdoor or hardware stores. Any plastic or glass container that previously held food or beverages such as 2-liter soda bottles or water, juice, punch or milk jugs, also may be used. Stainless steel can be used to store water which has not been or will not be treated with chlorine; chlorine is corrosive to most metals. 55 gal drums, designed specifiacally for water storage can be difficult to transport, if the need arises, but are of a tremendous value in an emergency .When looking for additional food grade containers, the bottom will be stamped with HDPE (High Density PolyEthylene) and coded with the recycle symbol and a “2″ inside. HDPE containers are FDA-approved for food. Containers without these designations aren’t OK because of possible chemical interactions between the water and the plastic. Clean used containers and lids with hot soapy water. Once the containers have been thoroughly cleaned, rinse them with water and sanitize the containers and lids by rinsing them with a solution of 1 tablespoon chlorine bleach per gallon of water. Leave the containers wet for two minutes, then rinse them again with water. Remember to remove the paper or plastic lid liners before washing the lids. It is very difficult to effectively remove all residue from many containers, so carefully clean hard-to-reach places like the handles of milk jugs. To sanitize stainless steel containers, place the container in boiling water for 10 minutes. Never use containers that previously held chemicals.
Do I Need to Treat Water?
Once you properly clean containers, fill them with potable, or safe, drinking water. All public water supplies are already treated and should be free of harmful bacteria. However, as an additional precaution, it is recommended that you add 5-7 drops, about 1/8 teaspoon, of chlorine bleach per gallon of water stored. This precaution protects you against any lingering organisms in storage containers that may have been inadvertently missed during the cleaning process.
Where to Store Water
Clearly label all water containers “drinking water” with the current date. Store the water in a cool, dry place away from direct sunlight and heat sources. Do not store it near gasoline, kerosene, pesticides or similar substances. When potable water is properly stored, it should have an indefinite shelf life; however, it’s a good idea to use and replace the stored water every 6 - 12 months. Rotating water this way provides you with an opportunity to experiment and check the amount of stored water against what you require. It also serves as an additional precaution against bacteria or viruses growing in containers which may not have been thoroughly or properly cleaned and sanitized. If you have freezer space, storing some water in the freezer is a good idea. If you lose electricity, the frozen water will help keep foods in your freezer frozen until the power is restored. Make sure you leave 2 to 3 inches of space in containers because water expands as it freezes.
Emergency Sources of Water
In an emergency, if you have not previously stored water and commercial or public sources of water are not available, drain water from your plumbing system. Unless you are advised that the public water supply has been contaminated and is not safe, open the drain valve at the bottom of the water heater and salvage the water stored in the heater. A typical water heater holds 30-60 gallons of water. Discard the first few gallons if they contain rust or sediment. Let the water heater cool before draining it from the heater so it does not scald you. Turn off the electricity or gas to the water heater to prevent the heater from operating without water. Once water has been drained into clean, sanitized containers, add 5-7 drops of chlorine bleach* per gallon of water, and stir or shake the solution to mix it. Let it set 30 minutes before use. Emergency Outdoor Water Sources If you need to find water outside your home, you can use these sources. Be sure to treat the water first. Additional sources include: Rainwater Streams, rivers and other moving bodies of water Ponds and lakes Natural springs Avoid water with floating material, an odor or dark color. Use saltwater only if you distill it first. You should not drink flood water. Hidden Water Sources in Your Home If a disaster catches you without a stored supply of clean water, you can use the water in your hot-water tank, pipes and ice cubes. As a last resort, you can use water in the reservoir tank of your toilet (not the bowl). Do you know the location of your incoming water valve? You’ll need to shut it off to stop contaminated water from entering your home if you hear reports of broken water or sewage lines. To use the water in your pipes, let air into the plumbing by turning on the faucet in your house at the highest level. A small amount of water will trickle out. Then obtain water from the lowest faucet in the house. To use the water in your hot-water tank, be sure the electricity or gas is off, and open the drain at the bottom of the tank. Start the water flowing by turning off the water intake valve and turning on a hot-water faucet. Do not turn on the gas or electricity when the tank is empty. Using Swimming Pool Water You should always view your pool as “backup” water; keep the water treated; you never know when it will be needed! The maintenance of the free chlorine residual will prevent establishment of any microorganisms. The maintenance level should be kept about 3-5ppm free chlorine. (See Water Purification for detailed information on purifying pool water.) If other stored water stocks are not available, remove the necessary pool water and boil it or just treat with chlorine to the normal 5ppm. It is best to err on the side of caution. Covering the pool at all times when not in use is a very good idea. Try to keep the cover clean and wash the area you put it on when removing it from the pool.
When and How to Treat Water for Storage
In an emergency, if you do not have water that you know is safe, it’s possible to purify water for drinking. Start with the cleanest water you can find and treat with one of the following methods:
* Boiling and chlorinating: Water can be purified by boiling. Boiling times may vary from state to state, depending on altitude. In Colorado, the water is safe to use once after it has been boiled for three to five minutes and has cooled. If you plan to store boiled water, pour it into clean, sanitized containers and let it cool to room temperature. Then add 5-7 drops, or 1/8 teaspoon, of chlorine bleach* per gallon of water (1/2 teaspoon per 5 gallons). Stir or shake the solution to mix it. Cap the containers and store them in a cool, dry place.
* Filtering and chlorinating: You can filter water if you have a commercial or backpack filter that filters to 1 micron. These are available in sporting good stores and are recommended for use when back-packing. They are not recommended to clean large volumes of water. Filtering eliminates parasites such as giardia and cryptosporidium, but it may not eliminate all bacteria and viruses. Therefore, it’s recommended that 5-7 drops (1/8 teaspoon) of chlorine bleach* be added per gallon of filtered water (1/2 teaspoon for 5 gallons). Stir or shake the solution to mix it. Wait 30 minutes before using the water, or cap the containers and store them in a cool, dry place.
*Use liquid household bleach that contains 5.25 percent hypochlorite. Do not use bleaches with fresheners or scents as they may not be safe to consume. The above treatment methods use a two-step approach so less bleach is needed, yet giardia and cryptosporidium are destroyed through boiling or eliminated by filtering. Chlorine may not be effective against these parasites. Since adding too much chlorine to water can be harmful, it’s important to be as accurate as possible when measuring.
* Distillation Distillation involves boiling water and then collecting the vapor that condenses back to water. The condensed vapor will not include salt and other impurities. To distill, fill a pot halfway with water. Tie a cup to the handle on the pot’s lid so that the cup will hang right-side-up when the lid is upside-down (make sure the cup is not dangling into the water) and boil the water for 20 minutes. The water that drips from the lid into the cup is distilled.
Most water filtration devices are designed for use on microbiologically safe water. Don’t assume they are safe to use on contaminated water. Check with the manufacturer to be sure. Use the following guidelines to determine if filtration equipment is adequate to use with microbiologically contaminated water:
Filtration Equipment
Safe on Microbiologically Contaminated Water?
Carbon Filter No
Reverse Osmosis No
Deionization Filter No
Pitcher Filter No
Faucet Mount Filter No
Steam Distiller Yes - but requires electricity
UV Sterilizer Yes - but requires electricity
Ceramic Filter Some - but only if rated for bacteriological protection
Equipment that is safe to use on contaminated water is often slow, costly, inconvenient and/or high maintenance.
It makes the most sense to use the filtration equipment that best meets your normal daily needs and shift to water storage or alternative methods of water treatment in times of emergencies.
<hr style="color: rgb(204, 204, 204);" size="1"> <!-- / icon and title --> <!-- message --> Biologically Active Sand Filter
http://www.friendswhocare.ca/I%20-%2...e%20Manual.doc
Installation, Operation, and Maintenance Manual
BioSand Water Filter
Humanitarian Service
Last Revised: March 2005
INSTALLATION
For a BioSand filter to operate properly, it must be installed and commissioned correctly. Make a checklist and use it to ensure that you have everything you’ll need before you head out to install a filter. A filter maintenance guide (such as a laminated sheet) should be left with the users of each filter. This guide could be attached to the filter or placed on a wall adjacent to the filter.
TRANSPORTING THE FILTER
Always consider the safety issues related to moving the filter. There can be injuries due to strains of the back, arms, and knees. Watch out for crushing or pinching of fingers and toes under or behind the filter. Keep in mind the size of the filter (12” x 12” x 36”) and its weight (160 Lbs - plus an additional 100 Lbs of media). It can be difficult and awkward to move this large object.
Some ways to move the filter include:
• Cart – animal or human powered
• Car, truck, or boat
• Carrying slings – wide, heavy canvas straps placed over the shoulder to lift a heavy object
• Dolly – a frame or rack with small wheels, strong enough to carry the weight
• Rollers – metal or wooden, round pieces that can be used to move the filter short distances
POSITIONING THE FILTER
It is important to determine a good location for the filter. Locating the filter inside the home is important not only for filter effectiveness, but also for the convenience of the user. If the users can access the filter easily, they will be more likely to use and maintain it. Once filled with media, the filter should not be moved.
The filter should be placed:
• In a protected location away from sunlight, wind, rain, animals, and children
• Preferably inside the home
• Near the food preparation or kitchen area (depending on the space and layout of the house)
• Where it can and will be used and maintained easily
• On level ground
• So that water can easily be poured in the top
Tip: You may have to add a step if the users are short, so that they don’t have to lift the bucket of unfiltered water above shoulder height.
• Where there’s adequate room for hauling and pouring pails of water into the filter, and storing the filtered water
PLACE THE MEDIA
Estimated Time: 10 minutes
Tools Needed:
• Approximately 3 litres of washed _” gravel
• Approximately 3 _ litres of washed _” gravel
• Approximately 25 litres of washed sand
• A stick (approximately 40” long, 1” x 2” is preferred)
• Measuring tape
• At least 2 buckets of water
1. Ensure that the drain hole (the standpipe opening at the bottom inside of the filter) is clear and unobstructed (i.e. is not covered by concrete and is not plugged by any debris.) The flow rate through the copper pipe without any media in the filter should be 1 litre / 25 seconds.
Tip: This step should have been done when the filter was removed from the mold, however, double check now before you get too far into the installation.
2. Ensure that the inside of the filter has been cleaned out (including dirt, dust, and oil from the mold).
3. Place a stick inside the filter so that it’s touching the bottom of the filter.
4. Draw a horizontal line on the stick where it meets the top edge of the filter.
5. Measure and mark a line 2” down from the first line.
6. Fill the filter half full of water.
Note: The media must always be added with water already in the filter to prevent pockets of air from being trapped within the media.
7. Add approximately 2” of underdrain (_”) gravel to the filter.
8. Level out the gravel, and use the stick to measure how much has been added. Place the bottom of the stick on the gravel. When the 2nd line on the stick lines up with the top edge of the filter, you have added enough gravel.
Note: Ensure that the gravel covers the drain hole near the bottom of the filter.
9. Measure and mark a line 2” down from the second line.
10. Add approximately 2” of support layer (_”) gravel to the filter.
11. Level out the gravel, and use the stick to measure how much has been added. Again, place the bottom of the stick on the gravel. When the 3rd line on the stick lines up with the top edge of the filter, you have added enough gravel.
12. Quickly pour approximately 20 litres of washed sand to the filter (ensuring that there is always water above the surface of the sand).
Note: A random distribution of different sand grain sizes is critical to the proper operation of the filter. Adding the sand quickly maintains the random distribution by not allowing the different sizes of grains to settle into layers.
13. Continue adding smaller quantities of sand until water starts to pour out of the spout. (Again, make sure that there is always water above the surface of the sand. Add water if necessary.)
14. When the water stops pouring out of the spout, the water level is equalized.
Note: The water level in the filter is determined by the spout. Due to a siphoning effect, the water will stop coming out of the filter when the water is at the same level as the bottom of the spout.
15. Smooth out the sand and then measure the depth of the water above the sand bed.
16. If the water depth is less than 2”: remove sand until the depth is 2” (with the sand surface level and the water level equalized).
17. If the water depth is more than 2”: repeat steps 13 to 17 until the water depth is 2”.
18. Smooth out the surface of the sand so that it’s as level as possible.
FLUSH THE FILTER
Estimated Time: 1 hour
Tools Needed:
• Diffuser
• 40 – 80 litres of water
1. Place the diffuser plate on the ledge inside the filter. Ensure that it fits snugly.
Note: The diffuser must not be touching the surface of the water at its resting level. That would greatly reduce the amount of oxygen in the standing water layer, affecting the survival of the schmutzdecke.
2. Place a receiving container under the spout. The water that it captures can be reused.
3. Pour the cleanest available water into the filter (turbidity < 30 NTU).
4. Observe the water coming out of the spout.
5. Continue adding water to the filter until the water coming out of the spout is clear. This may take 40-80 litres (10-20 Gallons)
Note: If the outlet water doesn’t run clear after 100 litres (25 Gallons), the gravel or sand was too dirty to start with. It is probably easiest to take the media out, wash it in pails, and then place it back in the filter.
TEST FLOW RATE
Estimated Time: 5 minutes
Tools Needed:
• Measuring container with 1 litre mark
• Stopwatch
• Bucket
1. Fill the filter to the top with water.
2. Place your measuring container under the spout to collect the outlet water.
3. Measure the time it takes to fill the container to the 1 litre mark. It should take between 50 – 80 seconds.
4. If it takes longer than 80 seconds, the flow rate is too slow.
• The filter will still work, but it may clog faster and more often, requiring more maintenance
• If it takes too long to get a pail of water, the user may not like the filter and may use untreated water
• The flow rate can be improved by “swirling” the top layer of the sand and then scooping out the dirty water
• If a few “swirl & dumps” do not improve the flow rate substantially, the sand is either too fine or too dirty – you will have to rewash the sand
5. If it takes less than 50 seconds to fill the measuring container to 1 litre, the flow rate is too fast.
• The filter may not function effectively
• The media should be replaced with finer media (less washed)
• A less preferable option is to run a considerable amount of water through the filter until the flow rate decreases (due to the capture of finer particles and faster growth of the biolayer)
Note: The flow rate through the filter decreases as the height of the water in the influent reservoir drops. As the water level reaches the diffuser, treated water may only drip out of the filter spout. It can take 40 – 90 minutes for the 20 litres in the reservoir to completely pass through the filter.
DISINFECT THE SPOUT
Estimated Time: 10 minutes
Tools Needed:
• 3’ of garden hose that just fits over the filter spout
• 1 hose clamp (if available)
• Funnel (can be made from the top of a soda or water bottle)
• Bleach solution (1/2 teaspoon bleach to 2 litres of water)
Note: Do NOT pour chlorine bleach into the top of the filter!
1. Place the garden hose over the filter spout.
2. Clamp the hose in place with the hose clamp.
3. Place the funnel on the other end of the garden hose.
4. Hold the funnel higher than the top of the filter, and pour 2 litres of bleach solution into the funnel.
5. Hold in place for 2 minutes.
6. Remove the garden hose and drain the bleach solution
7. Wipe the outside of the spout with a clean, bleach-soaked cloth.
8. Add 20 litres of water to the top of the filter to flush the bleach out. Instruct the user not to use this water for drinking or cooking.
9. Place the lid on the filter.
OPERATION
ESTABLISHING THE BIOLAYER
• The schmutzdecke or biolayer is the key bacteria removing component of the filter
• Without it, the filter removes some contamination through screening of the particles and microorganisms (only 30-70% removal efficiency)
• A good schmutzdecke will remove 90-99% of biological pathogens
• It may take 10 – 20 days to establish the schmutzdecke
• The water from the filter can be used during the first few weeks while the schmutzdecke is being established if a safer water source is not available, but chlorination is recommended at least during this time period
• The schmutzdecke is NOT usually visible – it is not a green slimy coating on top of the sand
DAILY USE
Educate all of the users, including children, on how and why the filter works and on the correct operation and maintenance. Children are frequently the main users of the filter.
• Slowly pour raw (untreated) water into the filter daily (at least 20 litres, twice per day)
• Using the same source of water every day will improve the filter effectiveness
• Use the best source of water (least contaminated) available – the better the raw water is, the better the treated water will be
• Pre-filter or settle raw water if not relatively clear – less than 50 NTU
Tip: A simple test to measure the turbidity is to fill a 2 litre clear plastic soft drink bottle with raw water. Place the bottle on top of large print such as the CAWST logo on this manual. If you can see the logo, the water probably has a turbidity of less than 50 NTU.
• The diffuser must always be in place when pouring water into the filter – never pour water directly onto the sand layer
• The lid should always be kept on the filter
• Use a designated bucket for fetching raw water
• Use a designated safe storage container to hold the treated water which has:
_ a small opening to prevent recontamination due to dipping with cups or hands
_ a tap or spigot
• Place the receiving container as close to the spout as possible (i.e. place it on a block) to reduce dripping noise and prevent recontamination
Note: The dripping noise can be irritating. The closer you place the container to the spout, the less dripping noise there is. A container with a small opening also reduces dripping noise.
• Water must always be allowed to flow freely from the filter – never plug the spout or connect a hose to it
Note: Plugging the spout could increase the water level in the filter, which could kill the biolayer due to lack of oxygen. Putting a hose or other device on the spout can siphon or drain the water in the filter, dropping the water level below the sand layer.
• No food should be stored inside the filter
Note: Some users want to store their food on the diffuser plate because it is a cool location. The water in the top of the filter is contaminated, so it will contaminate the food. Also, the food attracts insects to the filter.
• The treated water should be chlorinated after it passes through the filter to ensure the highest quality of water and to prevent recontamination (1-5 drops/litre or up to 1 teaspoon/gallon)
MAINTENANCE
Once a filter has been built, installed, and is operational, though minimal, there is some key maintenance that is required. The two primary requirements are disinfecting the spout and cleaning the biolayer when the flow rate is insufficient. Follow-up visits to ensure proper use and maintenance of the filters should be built into the hygiene education program.
DISINFECTION
• The spout will become contaminated during normal use via dirty hands, animals, or insects
• Clean the the spout every day with soap and water or a chlorine cleaning solution
• Wash the receiving container every second day with soap and water or a chlorine cleaning solution
• Do NOT pour chlorine bleach into the top of the filter!
• The entire filter should be cleaned regularly (lid, diffuser, outside surfaces)
SWIRL & DUMP
The flow rate through the filter will decrease over time as the schmutzdecke develops and fine particles are trapped in the upper layer of the sand. Users will know when the “swirl & dump” is required because the flow rate will drop to an unacceptable level. The filter is still effectively treating the water at this point; however the length of time that it takes to get a bucket of water may become too long and be inconvenient for the user. Alternately, you can measure the flow rate (as above) and if it is less than 0.3 litres/minute, “swirl & dump” maintenance is required.
1. Remove the lid of the filter.
2. Add 4 litres (1 gallon) of water to the top of the filter.
3. Remove the diffuser.
4. “Swirl” your hand around in the standing water at least 5 times – the water will become dirty. You can insert your fingers up to the first knuckle in the sand layer while “swirling” around across the entire surface area of the sand, but do not mix the surface layer deep into the filter.
5. Scoop out some dirty water with a small container (i.e. a cup or a pop bottle cut in half).
6. Discard the dirty water outside the house in an appropriate location (remember it is contaminated water).
7. Repeat this “swirl and dump” technique until all the water has been dumped out of the filter.
8. Replace the diffuser.
9. Pour 20 litres (5 gallons) of water into the top of the filter.
10. Measure the flow rate (as above).
11. Repeat steps 1 through 10 until the flow rate is acceptable (close to 1 litre/minute).
12. Wash your hands with soap and clean water - you have been handling contaminated water.
FOLLOW UP VISITS
Follow up with the users on a regular basis to ensure that the filter is being used properly. The first follow up visit should be during the first two weeks of use and then every 1-2 months thereafter. During follow up visits, ensure that the filter is being operated and maintained as described above. The following general checks can be made at any time by the users, a community health worker, or a filter technician that is active in the area:
• Check that the filter is in an appropriate location (indoors, protected from the weather, animals, and insects) and is level
• Look for drips of water or wet spots under the filter, which indicate a leak in the concrete box
• Check that the lid is tight fitting and clean on the inside and outside
• Make sure the diffuser is clean and is sitting properly on the concrete lip
• Make sure the holes in the diffuser are not plugged – periodic cleaning may be needed
• Check that the surface of the sand is smooth and level (use a small straight object to smooth the sand ONLY if necessary)
• Make sure the surface of the sand is 2” (5cm) below the water level.
Note: the sand may settle over time and more will have to be added. Add (or remove) sand if the standing water depth is not 2”.
#12, 2916 – 5th Ave N.E.
Calgary, Alberta, Canada T2A 6K4
Telephone: (403) 243-3285
Fax: (403) 243-6199
Email: cawst@cawst.org
Website: www.cawst.org
<!-- / message --> <!-- controls -->
---------------------------------------------------------------------------------------------------------------------------------------------------------------
http://www.nationalterroralert.com/safewater/
Emergency Water Storage
Having an ample supply of safe, clean water is a top priority in an emergency. A normally active person needs to drink at least two quarts of water each day. Hot environments can double that amount. Children, nursing mothers and ill people will need even more. You will also need water for food preparation and hygiene. Store a total of at least one gallon per person, per day. You should store at least a two-week supply of water for each member of your family. If supplies run low, never ration water. Drink the amount you need today, and try to find more for tomorrow. You can minimize the amount of water your body needs by reducing activity and staying cool.
Amount of Water to Store
Whereas a quart of water or other fluid daily will sustain life, according to the Department of Defense and the Office of Civil Defense, it is recommended that a gallon of water per day per person be stored for food preparation and drinking. A gallon provides added comfort and accommodates increased fluid needs at higher altitudes or warm climates. An additional one-half to 1 gallon per day is recommended for bathing and hygiene, and to wash dishes. How much water should I store? The rule of thumb is to store at least one gallon per person per day for at least 3 days (for earthquake preparedness). That’s 2 quarts for drinking and 2 quarts for food preparation and sanitation. A family of four should store a minimum of 12 gallons of water. Personally, I recommend at least a 10 day supply of water and a 30 day supply if it all possible. Use the following guidelines when storing water: 1. Store drinking water in carefully cleaned, non-corrosive, tightly covered containers. 2. Store containers in a cool dark place. DO NOT store in direct sunlight. Polyethylene plastics (prepackaged milk and water bottles) are somewhat permeable to hydrocarbon vapors. Keep away from stored gasoline, kerosene, pesticides, or similar substances. 3. Stored tap water should be rotated every 6 months. Prepackaged bottled water should be rotated once a year. Check the pull date on the container. Be sure it didn’t sit on the store’s shelf for a year before you purchased it. Self Serve Bottled Water should be rotated once a year, as long as the water treatment process includes ozonation. 4. Rotate your stored water with the water you use on a regular basis. This practice helps insure you don’t have water stored longer than one year.
Containers That Can be Used for Water Storage
Food-grade plastic or glass containers are suitable for storing water. One-, three- and five-gallon water containers can be purchased from most outdoor or hardware stores. Any plastic or glass container that previously held food or beverages such as 2-liter soda bottles or water, juice, punch or milk jugs, also may be used. Stainless steel can be used to store water which has not been or will not be treated with chlorine; chlorine is corrosive to most metals. 55 gal drums, designed specifiacally for water storage can be difficult to transport, if the need arises, but are of a tremendous value in an emergency .When looking for additional food grade containers, the bottom will be stamped with HDPE (High Density PolyEthylene) and coded with the recycle symbol and a “2″ inside. HDPE containers are FDA-approved for food. Containers without these designations aren’t OK because of possible chemical interactions between the water and the plastic. Clean used containers and lids with hot soapy water. Once the containers have been thoroughly cleaned, rinse them with water and sanitize the containers and lids by rinsing them with a solution of 1 tablespoon chlorine bleach per gallon of water. Leave the containers wet for two minutes, then rinse them again with water. Remember to remove the paper or plastic lid liners before washing the lids. It is very difficult to effectively remove all residue from many containers, so carefully clean hard-to-reach places like the handles of milk jugs. To sanitize stainless steel containers, place the container in boiling water for 10 minutes. Never use containers that previously held chemicals.
Do I Need to Treat Water?
Once you properly clean containers, fill them with potable, or safe, drinking water. All public water supplies are already treated and should be free of harmful bacteria. However, as an additional precaution, it is recommended that you add 5-7 drops, about 1/8 teaspoon, of chlorine bleach per gallon of water stored. This precaution protects you against any lingering organisms in storage containers that may have been inadvertently missed during the cleaning process.
Where to Store Water
Clearly label all water containers “drinking water” with the current date. Store the water in a cool, dry place away from direct sunlight and heat sources. Do not store it near gasoline, kerosene, pesticides or similar substances. When potable water is properly stored, it should have an indefinite shelf life; however, it’s a good idea to use and replace the stored water every 6 - 12 months. Rotating water this way provides you with an opportunity to experiment and check the amount of stored water against what you require. It also serves as an additional precaution against bacteria or viruses growing in containers which may not have been thoroughly or properly cleaned and sanitized. If you have freezer space, storing some water in the freezer is a good idea. If you lose electricity, the frozen water will help keep foods in your freezer frozen until the power is restored. Make sure you leave 2 to 3 inches of space in containers because water expands as it freezes.
Emergency Sources of Water
In an emergency, if you have not previously stored water and commercial or public sources of water are not available, drain water from your plumbing system. Unless you are advised that the public water supply has been contaminated and is not safe, open the drain valve at the bottom of the water heater and salvage the water stored in the heater. A typical water heater holds 30-60 gallons of water. Discard the first few gallons if they contain rust or sediment. Let the water heater cool before draining it from the heater so it does not scald you. Turn off the electricity or gas to the water heater to prevent the heater from operating without water. Once water has been drained into clean, sanitized containers, add 5-7 drops of chlorine bleach* per gallon of water, and stir or shake the solution to mix it. Let it set 30 minutes before use. Emergency Outdoor Water Sources If you need to find water outside your home, you can use these sources. Be sure to treat the water first. Additional sources include: Rainwater Streams, rivers and other moving bodies of water Ponds and lakes Natural springs Avoid water with floating material, an odor or dark color. Use saltwater only if you distill it first. You should not drink flood water. Hidden Water Sources in Your Home If a disaster catches you without a stored supply of clean water, you can use the water in your hot-water tank, pipes and ice cubes. As a last resort, you can use water in the reservoir tank of your toilet (not the bowl). Do you know the location of your incoming water valve? You’ll need to shut it off to stop contaminated water from entering your home if you hear reports of broken water or sewage lines. To use the water in your pipes, let air into the plumbing by turning on the faucet in your house at the highest level. A small amount of water will trickle out. Then obtain water from the lowest faucet in the house. To use the water in your hot-water tank, be sure the electricity or gas is off, and open the drain at the bottom of the tank. Start the water flowing by turning off the water intake valve and turning on a hot-water faucet. Do not turn on the gas or electricity when the tank is empty. Using Swimming Pool Water You should always view your pool as “backup” water; keep the water treated; you never know when it will be needed! The maintenance of the free chlorine residual will prevent establishment of any microorganisms. The maintenance level should be kept about 3-5ppm free chlorine. (See Water Purification for detailed information on purifying pool water.) If other stored water stocks are not available, remove the necessary pool water and boil it or just treat with chlorine to the normal 5ppm. It is best to err on the side of caution. Covering the pool at all times when not in use is a very good idea. Try to keep the cover clean and wash the area you put it on when removing it from the pool.
When and How to Treat Water for Storage
In an emergency, if you do not have water that you know is safe, it’s possible to purify water for drinking. Start with the cleanest water you can find and treat with one of the following methods:
* Boiling and chlorinating: Water can be purified by boiling. Boiling times may vary from state to state, depending on altitude. In Colorado, the water is safe to use once after it has been boiled for three to five minutes and has cooled. If you plan to store boiled water, pour it into clean, sanitized containers and let it cool to room temperature. Then add 5-7 drops, or 1/8 teaspoon, of chlorine bleach* per gallon of water (1/2 teaspoon per 5 gallons). Stir or shake the solution to mix it. Cap the containers and store them in a cool, dry place.
* Filtering and chlorinating: You can filter water if you have a commercial or backpack filter that filters to 1 micron. These are available in sporting good stores and are recommended for use when back-packing. They are not recommended to clean large volumes of water. Filtering eliminates parasites such as giardia and cryptosporidium, but it may not eliminate all bacteria and viruses. Therefore, it’s recommended that 5-7 drops (1/8 teaspoon) of chlorine bleach* be added per gallon of filtered water (1/2 teaspoon for 5 gallons). Stir or shake the solution to mix it. Wait 30 minutes before using the water, or cap the containers and store them in a cool, dry place.
*Use liquid household bleach that contains 5.25 percent hypochlorite. Do not use bleaches with fresheners or scents as they may not be safe to consume. The above treatment methods use a two-step approach so less bleach is needed, yet giardia and cryptosporidium are destroyed through boiling or eliminated by filtering. Chlorine may not be effective against these parasites. Since adding too much chlorine to water can be harmful, it’s important to be as accurate as possible when measuring.
* Distillation Distillation involves boiling water and then collecting the vapor that condenses back to water. The condensed vapor will not include salt and other impurities. To distill, fill a pot halfway with water. Tie a cup to the handle on the pot’s lid so that the cup will hang right-side-up when the lid is upside-down (make sure the cup is not dangling into the water) and boil the water for 20 minutes. The water that drips from the lid into the cup is distilled.
Most water filtration devices are designed for use on microbiologically safe water. Don’t assume they are safe to use on contaminated water. Check with the manufacturer to be sure. Use the following guidelines to determine if filtration equipment is adequate to use with microbiologically contaminated water:
Filtration Equipment
Safe on Microbiologically Contaminated Water?
Carbon Filter No
Reverse Osmosis No
Deionization Filter No
Pitcher Filter No
Faucet Mount Filter No
Steam Distiller Yes - but requires electricity
UV Sterilizer Yes - but requires electricity
Ceramic Filter Some - but only if rated for bacteriological protection
Equipment that is safe to use on contaminated water is often slow, costly, inconvenient and/or high maintenance.
It makes the most sense to use the filtration equipment that best meets your normal daily needs and shift to water storage or alternative methods of water treatment in times of emergencies.
Sally Furniss
Well-known member
Re: Water and Chlorine
http://www.princeton.edu/~oa/manual/water.shtml
OA Guide to Water Purification part of The Backpacker's Field Manual
by Rick Curtis
Water Purification
Dipping your head into a cold mountain stream and taking a long refreshing drink is an experience that has basically vanished from the wilderness areas of America. With the increased use of the wilderness there has also been an increase in the amount of bacteriological contamination of backcountry water supplies. The U.S. Environmental Protection Agency reports that 90 percent of the world?s water is contaminated in some way. There are a variety of microscopic organisms that can contaminate water supplies and cause potentially serious, even fatal, illnesses among wilderness travelers. The major danger in the backcountry from these infections is fluid loss due to diarrhea and vomiting, which can lead to hypovolemic shock and possibly death (see Diarrhea or Vomiting, page 315; Fluid Electrolyte Replacement, page 286; Shock, page 238).
In order to drink the water, you should be prepared to treat it. There are numerous methods of water purification, described below in order of effectiveness. Remember, however, that infections can also be spread through poor personal hygiene, something that purifying your water won?t prevent.
Biologically Contaminated vs. Toxic Water
Biologically contaminated water is water that contains microorganisms such as Giardia (a common microorganism that, if not killed, leads to intestinal disorders), bacteria, or viruses that can lead to infections (see Gastrointestinal Infections, page 316). Toxic water sources contain chemical contamination from pesticide runoffs, mine tailings, and so on. Boiling, filtering, or chemically treating water can remove or kill microorganisms, but it will not remove chemical toxins. This is also the case when using a solar still (see page 223).
Boiling
Boiling is the most certain way of killing all microorganisms. According to the Wilderness Medical Society, water temperatures above 160? F (70? C) kill all pathogens within 30 minutes and above 185? F (85? C) within a few minutes. So in the time it takes for the water to reach the boiling point (212? F or 100? C) from 160? F (70? C), all pathogens will be killed, even at high altitude. To be extra safe, let the water boil rapidly for one minute, especially at higher altitudes since water boils at a lower temperature (see page 68.)
Chemical Purification
There are two types of chemical treatment: those using iodine and those using chlorine. There are a variety of products on the market, so follow the directions on the bottle. Be advised that many of the tablets have an expiration date and become ineffective after that point. Also, once the bottle has been opened, the tablets must be used within a certain period. When in doubt, buy a new bottle. Remember that chemical purification methods may only be partially effective, depending on the water temperature.
General Chemical Treatment Procedures
* The effectiveness of all chemical treatment of water is related to the temperature, pH level, and clarity of the water. Cloudy water often requires higher concentrations of chemical to disinfect.
* If the water is cloudy or filled with large particles, strain it, using a cloth, before treatment. Large particles, if swallowed, may be purified only "on the outside."
* Add the chemical to the water and swish it around to aid in dissolving. Splash some of the water with the chemical onto the lid and the threads of the water bottle so that all water areas are treated.
* The water should sit for at least 30 minutes after adding the chemical to allow purification to occur. If using tablets, let the water sit for 30 minutes after the tablet has dissolved.
* The colder the water, the less effective the chemical is as a purifying agent. Research has shown that at 50? F (10? C), only 90 percent of Giardia cysts were inactivated after 30 minutes of exposure. If the water temperature is below 40? F (4? C), double the treatment time before drinking. It is best if water is at least 60? F (16? C) before treating. You can place the water in the sun to warm it before treating.
* Chemically treated water can be made to taste better by pouring it back and forth between containers, after it has been adequately treated. Other methods include adding a pinch of salt per quart or adding flavorings (e.g., lemonade mix, etc.) after the chemical treatment period.
Iodine Treatment
Iodine is light sensitive and must always be stored in a dark bottle. It works best if the water is over 68? F (21? C). Iodine has been shown to be more effect than chlorine-based treatments in inactivating Giardia cysts. Be aware that some people are allergic to iodine and cannot use it as a form of water purification. Persons with thyroid problems or on lithum, women over fifty, and pregnant women should consult their physician prior to using iodine for purification. Also, some people who are allergic to shellfish are also allergic to iodine. If someone cannot use iodine, use either a chlorine-based product or a non-iodine-based filter, such as the PUR Hiker Microfilter, MSR WaterWorks, or the Katadyn Water Filter.
Generally, the procedure is as follows:
* Liquid 2% Tincture of Iodine Add 5 drops per quart when the water is clear. Add 10 drops per quart when the water is cloudy.
* Polar Pure Iodine Crystals Fill the Polar Pure bottle with water and shake. The solution will be ready for use in one hour. Add the number of capfuls (per quart of water treated) listed on the bottle, based on the temperature of the iodine solution. The particle trap prevents crystals from getting into the water being treated. It is important to note that you are using the iodine solution to treat the water, not the iodine crystals. The concentration of iodine in a crystal is poisonous and can burn tissue or eyes. Let the treated water stand for 30 minutes before drinking. In order to destroy Giardia cysts, the drinking water must be at least 68? F (20? C). The water can be warmed in the sun before treating or hot water can be added. Refill the treatment bottle after use so that the solution will be ready one hour later. Crystals in the bottle make enough solution to treat about 2,000 quarts. Discard the bottle when empty.
* Potable Aqua This is an iodine tablet product. Follow the manufacturer?s instructions for use.
Chlorine Treatment
Chlorine can be used for persons with iodine allergies or restrictions. Remember that water temperature, sediment level, and contact time are all elements in killing microorganisms in the water. Halazone is an example of a chlorine tablet product. To use, follow the manufacturer?s instructions.
Tricks of the Trail
* Backups Always have at least one backup method for water purification in case one fails. This can be any combination of methods. I?m the cautious type, so I always have two backup methods: water filter and 2% tincture of iodine or Polar Pure iodine crystals. And I can always boil the water. If boiling is your backup method, make sure you have enough fuel.
* Fix the Taste Adding vitamin C (about 50 milligrams) to iodized water completely eliminates any taste or color of iodine. You must wait until the iodine has purified the water before adding the vitamin C. The vitamin C in drink mixes like Tang? has the same effect.
Filtration
There are a number of devices on the market that filter out microorganisms. A water filter pumps water through a microscopic filter that is rated for a certain-size organism. The standard size rating is the micron (the period at the end of this sentence is about 600 microns). Depending on the micron rating of the filter, smaller organisms (like viruses) can pass through. Be cautious when selecting a filter. You should know what potential organisms you need to treat for. You don?t want to go to an area where a virus like hepatitis A is present in the water (a problem in some developing countries) with a filter that will handle only a larger organism like Giardia.
Common microorganisms and the filter size needed:
Organism, Examples, General Size, Filter Type, Particle Size Rating
Protozoa: Giardia, Cryptosporidium, 5 microns or larger, Water filter 1.0?4.0 microns
Bacteria: Cholera, E. coli, Salmonella 0.2?0.5 microns Microfilter 0.2?1.0 microns
Viruses: Hepatitis A, rotavirus, Norwalk virus 0.004 microns Water purifier to 0.004 microns
There are two basic types of filters (descriptions of several popular models begin on the facing page).
* Membrane Filters use thin sheets with precisely sized pores that prevent objects larger than the pore size from passing through. Pro: Relatively easy to clean. Con: Clog more quickly than depth filters. Example: PUR-Hiker.
* Depth Filters use thick porous materials such as carbon or ceramic to trap particles as water flows through the material. Pro: Can be partially cleaned by backwashing. Activated carbon filters also remove a range of organic chemicals and heavy metals. Con: Rough treatment can crack the filter, rendering it useless. Examples: MSR WaterWorks II, Katadyn.
Note: There is a difference between a water filter and a water purifier. Filters do not filter out viruses, but there are water purifiers, like the PUR Scout, that pass the water through both a filter and an iodine compound that kills any smaller organisms that have passed through the filter. These purifiers kill all microorganisms down to 0.004 microns; however, the filter should not be used by people who are allergic to iodine.
Common Practices for Using a Water Filter
* Filter the cleanest water you can find. Dirty water or water with large suspended particles will clog your filter more quickly.
* Prefilter the water either through a prefilter on the pump or strain it through a bandanna.
* If you must filter dirty water, let it stand overnight for particles to settle out.
http://www.princeton.edu/~oa/manual/water.shtml
OA Guide to Water Purification part of The Backpacker's Field Manual
by Rick Curtis
Water Purification
Dipping your head into a cold mountain stream and taking a long refreshing drink is an experience that has basically vanished from the wilderness areas of America. With the increased use of the wilderness there has also been an increase in the amount of bacteriological contamination of backcountry water supplies. The U.S. Environmental Protection Agency reports that 90 percent of the world?s water is contaminated in some way. There are a variety of microscopic organisms that can contaminate water supplies and cause potentially serious, even fatal, illnesses among wilderness travelers. The major danger in the backcountry from these infections is fluid loss due to diarrhea and vomiting, which can lead to hypovolemic shock and possibly death (see Diarrhea or Vomiting, page 315; Fluid Electrolyte Replacement, page 286; Shock, page 238).
In order to drink the water, you should be prepared to treat it. There are numerous methods of water purification, described below in order of effectiveness. Remember, however, that infections can also be spread through poor personal hygiene, something that purifying your water won?t prevent.
Biologically Contaminated vs. Toxic Water
Biologically contaminated water is water that contains microorganisms such as Giardia (a common microorganism that, if not killed, leads to intestinal disorders), bacteria, or viruses that can lead to infections (see Gastrointestinal Infections, page 316). Toxic water sources contain chemical contamination from pesticide runoffs, mine tailings, and so on. Boiling, filtering, or chemically treating water can remove or kill microorganisms, but it will not remove chemical toxins. This is also the case when using a solar still (see page 223).
Boiling
Boiling is the most certain way of killing all microorganisms. According to the Wilderness Medical Society, water temperatures above 160? F (70? C) kill all pathogens within 30 minutes and above 185? F (85? C) within a few minutes. So in the time it takes for the water to reach the boiling point (212? F or 100? C) from 160? F (70? C), all pathogens will be killed, even at high altitude. To be extra safe, let the water boil rapidly for one minute, especially at higher altitudes since water boils at a lower temperature (see page 68.)
Chemical Purification
There are two types of chemical treatment: those using iodine and those using chlorine. There are a variety of products on the market, so follow the directions on the bottle. Be advised that many of the tablets have an expiration date and become ineffective after that point. Also, once the bottle has been opened, the tablets must be used within a certain period. When in doubt, buy a new bottle. Remember that chemical purification methods may only be partially effective, depending on the water temperature.
General Chemical Treatment Procedures
* The effectiveness of all chemical treatment of water is related to the temperature, pH level, and clarity of the water. Cloudy water often requires higher concentrations of chemical to disinfect.
* If the water is cloudy or filled with large particles, strain it, using a cloth, before treatment. Large particles, if swallowed, may be purified only "on the outside."
* Add the chemical to the water and swish it around to aid in dissolving. Splash some of the water with the chemical onto the lid and the threads of the water bottle so that all water areas are treated.
* The water should sit for at least 30 minutes after adding the chemical to allow purification to occur. If using tablets, let the water sit for 30 minutes after the tablet has dissolved.
* The colder the water, the less effective the chemical is as a purifying agent. Research has shown that at 50? F (10? C), only 90 percent of Giardia cysts were inactivated after 30 minutes of exposure. If the water temperature is below 40? F (4? C), double the treatment time before drinking. It is best if water is at least 60? F (16? C) before treating. You can place the water in the sun to warm it before treating.
* Chemically treated water can be made to taste better by pouring it back and forth between containers, after it has been adequately treated. Other methods include adding a pinch of salt per quart or adding flavorings (e.g., lemonade mix, etc.) after the chemical treatment period.
Iodine Treatment
Iodine is light sensitive and must always be stored in a dark bottle. It works best if the water is over 68? F (21? C). Iodine has been shown to be more effect than chlorine-based treatments in inactivating Giardia cysts. Be aware that some people are allergic to iodine and cannot use it as a form of water purification. Persons with thyroid problems or on lithum, women over fifty, and pregnant women should consult their physician prior to using iodine for purification. Also, some people who are allergic to shellfish are also allergic to iodine. If someone cannot use iodine, use either a chlorine-based product or a non-iodine-based filter, such as the PUR Hiker Microfilter, MSR WaterWorks, or the Katadyn Water Filter.
Generally, the procedure is as follows:
* Liquid 2% Tincture of Iodine Add 5 drops per quart when the water is clear. Add 10 drops per quart when the water is cloudy.
* Polar Pure Iodine Crystals Fill the Polar Pure bottle with water and shake. The solution will be ready for use in one hour. Add the number of capfuls (per quart of water treated) listed on the bottle, based on the temperature of the iodine solution. The particle trap prevents crystals from getting into the water being treated. It is important to note that you are using the iodine solution to treat the water, not the iodine crystals. The concentration of iodine in a crystal is poisonous and can burn tissue or eyes. Let the treated water stand for 30 minutes before drinking. In order to destroy Giardia cysts, the drinking water must be at least 68? F (20? C). The water can be warmed in the sun before treating or hot water can be added. Refill the treatment bottle after use so that the solution will be ready one hour later. Crystals in the bottle make enough solution to treat about 2,000 quarts. Discard the bottle when empty.
* Potable Aqua This is an iodine tablet product. Follow the manufacturer?s instructions for use.
Chlorine Treatment
Chlorine can be used for persons with iodine allergies or restrictions. Remember that water temperature, sediment level, and contact time are all elements in killing microorganisms in the water. Halazone is an example of a chlorine tablet product. To use, follow the manufacturer?s instructions.
Tricks of the Trail
* Backups Always have at least one backup method for water purification in case one fails. This can be any combination of methods. I?m the cautious type, so I always have two backup methods: water filter and 2% tincture of iodine or Polar Pure iodine crystals. And I can always boil the water. If boiling is your backup method, make sure you have enough fuel.
* Fix the Taste Adding vitamin C (about 50 milligrams) to iodized water completely eliminates any taste or color of iodine. You must wait until the iodine has purified the water before adding the vitamin C. The vitamin C in drink mixes like Tang? has the same effect.
Filtration
There are a number of devices on the market that filter out microorganisms. A water filter pumps water through a microscopic filter that is rated for a certain-size organism. The standard size rating is the micron (the period at the end of this sentence is about 600 microns). Depending on the micron rating of the filter, smaller organisms (like viruses) can pass through. Be cautious when selecting a filter. You should know what potential organisms you need to treat for. You don?t want to go to an area where a virus like hepatitis A is present in the water (a problem in some developing countries) with a filter that will handle only a larger organism like Giardia.
Common microorganisms and the filter size needed:
Organism, Examples, General Size, Filter Type, Particle Size Rating
Protozoa: Giardia, Cryptosporidium, 5 microns or larger, Water filter 1.0?4.0 microns
Bacteria: Cholera, E. coli, Salmonella 0.2?0.5 microns Microfilter 0.2?1.0 microns
Viruses: Hepatitis A, rotavirus, Norwalk virus 0.004 microns Water purifier to 0.004 microns
There are two basic types of filters (descriptions of several popular models begin on the facing page).
* Membrane Filters use thin sheets with precisely sized pores that prevent objects larger than the pore size from passing through. Pro: Relatively easy to clean. Con: Clog more quickly than depth filters. Example: PUR-Hiker.
* Depth Filters use thick porous materials such as carbon or ceramic to trap particles as water flows through the material. Pro: Can be partially cleaned by backwashing. Activated carbon filters also remove a range of organic chemicals and heavy metals. Con: Rough treatment can crack the filter, rendering it useless. Examples: MSR WaterWorks II, Katadyn.
Note: There is a difference between a water filter and a water purifier. Filters do not filter out viruses, but there are water purifiers, like the PUR Scout, that pass the water through both a filter and an iodine compound that kills any smaller organisms that have passed through the filter. These purifiers kill all microorganisms down to 0.004 microns; however, the filter should not be used by people who are allergic to iodine.
Common Practices for Using a Water Filter
* Filter the cleanest water you can find. Dirty water or water with large suspended particles will clog your filter more quickly.
* Prefilter the water either through a prefilter on the pump or strain it through a bandanna.
* If you must filter dirty water, let it stand overnight for particles to settle out.
Sally Furniss
Well-known member
Re: Water and Chlorine
Thanks to Corky52 at Planforpandemic for this information.
Pool "Dry chlorine, also called calcium hypochlorite has the added benefit of extended shelf life. Providing it is kept dry, cool and in an airtight container, it may be stored up to 10 years with minimal degradation. If you want to keep chlorine in larger quantities, this is the item to store . It must be at least 65% calcium hypochlorite, no addtional anti-fungals or clarifiers. In an EXTREMELY well ventilated area, (Hint: OUTSIDE!) add and dissolve one heaping teaspoon of high-test granular calcium hypochlorite (approximately 1/4 ounce) for each two gallons of water. Five pounds of dry pool bleach costs about $10-15, which will make about 92 gallons of bleach, which will sterilize 706,560 gallons of clear water, or 353,280 gallons of cloudy water.
Once mixed use like standard Chlorine bleach. After six month throw out and mix a new batch to keep maximun stregnth.
Thanks to Corky52 at Planforpandemic for this information.
Pool "Dry chlorine, also called calcium hypochlorite has the added benefit of extended shelf life. Providing it is kept dry, cool and in an airtight container, it may be stored up to 10 years with minimal degradation. If you want to keep chlorine in larger quantities, this is the item to store . It must be at least 65% calcium hypochlorite, no addtional anti-fungals or clarifiers. In an EXTREMELY well ventilated area, (Hint: OUTSIDE!) add and dissolve one heaping teaspoon of high-test granular calcium hypochlorite (approximately 1/4 ounce) for each two gallons of water. Five pounds of dry pool bleach costs about $10-15, which will make about 92 gallons of bleach, which will sterilize 706,560 gallons of clear water, or 353,280 gallons of cloudy water.
Once mixed use like standard Chlorine bleach. After six month throw out and mix a new batch to keep maximun stregnth.
Sally Furniss
Well-known member
Re: Water and Chlorine
The outer casing on some water filter or purifier are easily cracked if dropped.
Has any one got any ideas on how to fix the outer case if it breaks?
Can the case be glued, sealed or taped back together?
The outer casing on some water filter or purifier are easily cracked if dropped.
Has any one got any ideas on how to fix the outer case if it breaks?
Can the case be glued, sealed or taped back together?
Sally Furniss
Well-known member
Re: Water and Chlorine
If the outer casing breaks on a water filter or purifyer the filter can stil be used.
Thanks to Gilmore fore permission to repost this.
http://gilmore100.photosite.com/album1/
5 Pictures of Homemade filter
Picture of Black Berkey filter
Picture of 2 buckets, one atop the other
Picture of filter installed in Upper bucket
Picture of bottom side of Upper Bucket
Picture of Lower bucket
(option spigot is shown)
If the outer casing breaks on a water filter or purifyer the filter can stil be used.
Thanks to Gilmore fore permission to repost this.
http://gilmore100.photosite.com/album1/
5 Pictures of Homemade filter
Picture of Black Berkey filter
Picture of 2 buckets, one atop the other
Picture of filter installed in Upper bucket
Picture of bottom side of Upper Bucket
Picture of Lower bucket
(option spigot is shown)
Attachments
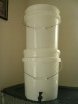
Re: Water and Chlorine
How about swimming pool water?
I have a pool that holds about 18,000 gallons of water. It is chlorinated and runs through 300 pound sand filter.
In the winter, we drop the water level below all intake and outflow openings, and add winterizing chemicals.
Besides bathing and toilet use, do you think running the water through a Berkey Filter would make it drinkable?
How about swimming pool water?
I have a pool that holds about 18,000 gallons of water. It is chlorinated and runs through 300 pound sand filter.
In the winter, we drop the water level below all intake and outflow openings, and add winterizing chemicals.
Besides bathing and toilet use, do you think running the water through a Berkey Filter would make it drinkable?


Mellie
Well-known member
Re: Water and Chlorine
Typed in from my Solar Living Real Goods Sourcebook:
[FONT=Verdana, Arial, sans-serif][SIZE=-1][SIZE=-1][FONT=Verdana, Arial, sans-serif][FONT=Verdana, Arial, sans-serif][SIZE=-1] Reverse osmosis (RO) is a water purification technology that utilizes normal household water pressure to force water through a selective semi-permeable membrane that separates contaminants from the water. Treated water emerges from the other side of the membrane, and the accumulated impurities left behind are washed away. Eventually sediments builds up along the membrane and it needs to be replaced. (I think this can last several years.)
[/FONT][/SIZE][/FONT][/SIZE][/SIZE][/FONT]RO systems have two major drawbacks.
Typed in from my Solar Living Real Goods Sourcebook:
[FONT=Verdana, Arial, sans-serif][SIZE=-1][SIZE=-1][FONT=Verdana, Arial, sans-serif][FONT=Verdana, Arial, sans-serif][SIZE=-1] Reverse osmosis (RO) is a water purification technology that utilizes normal household water pressure to force water through a selective semi-permeable membrane that separates contaminants from the water. Treated water emerges from the other side of the membrane, and the accumulated impurities left behind are washed away. Eventually sediments builds up along the membrane and it needs to be replaced. (I think this can last several years.)
[/FONT][/SIZE][/FONT][/SIZE][/SIZE][/FONT]RO systems have two major drawbacks.
- First, they waste a large amount of water. They'll use anywhere from three to nine gallons of water per gallon of purified water produced. This could be a problem in areas where conservation is a concern, and it may be slightly expensive if you're paying for municipal water. On the other hand, this wastewater can be recovered or redirected for purposes other than drinking, such as watering the garden, washing the car, etc.
- Second, reverse osmosis treats water slowly: it takes about 3 to 4 hours for a residential RO unit to produce one gallon of purified water. Treated water can be removed and stored for later use.
Mellie
Well-known member
Re: Water and Chlorine
Goju, here's our inexpensive Doulton (simple siphon) filter alternative:
http://www.pwgazette.com/gravity.htm
We have a 500 gallon water tank with runoff system from the roof and a hot tub. Got one Style A ($40) for the tank and one Style C with Style A ($62) for the hottub. The website talks about using water from a pool, similar issues as with a hottub.
We also have other options, like a creek behind the house and a firepit and wood for boiling water if necessary.
More info on water here:
http://www.flutrackers.com/forum/showthread.php?t=5668
.
Goju, here's our inexpensive Doulton (simple siphon) filter alternative:
http://www.pwgazette.com/gravity.htm
We have a 500 gallon water tank with runoff system from the roof and a hot tub. Got one Style A ($40) for the tank and one Style C with Style A ($62) for the hottub. The website talks about using water from a pool, similar issues as with a hottub.
We also have other options, like a creek behind the house and a firepit and wood for boiling water if necessary.
More info on water here:
http://www.flutrackers.com/forum/showthread.php?t=5668
.
Re: Water and Chlorine
The info on chlorine is mostly right. Depending on who you check with the answer is all over the place. As an example:
For the standard 5.25% concentration of liquid bleach, to treat a gallon of ?clean? water, the Red Cross says to use 15 drops, the South Dakota Dept. of Environment and Natural Resources says 3, LSU and North Carolina U. say 16, the US Army says 1-2, Ohio State University says 5, the EPA says, 8-10, and 8/40. The City of North Miami says 16, and FEMA is all over the place. Tracing it back to the most popular source, Clorox says to use ?? capful (1 teaspoon)? and doesn?t mention the number of drops, although it would be far more than 16. Further complicating the issue is exactly how many drops are in a teaspoon? This is important to know when treating larger quantities of water.
Basically, the reason for this is because most emergency preparedness sources recommend using a fairly high concentration of chlorine either because they assume a user doesn?t knows what the actual chlorine content of the bleach is, doesn?t know the relationship between concentration and exposure time, doesn?t know the relationship between exposure time and water temperature, can?t count, or figure it is better to be safe than sorry. Or maybe they don?t know how many drops are in a teaspoon and assume nobody else does either. Also, there is about a 16:1 range for the amount of chlorine in municipal water.
Since there were some questions on Calcium Hypochlorite, here is the info:
Calcium Hypochlorite
Should you want a lot of chlorine based product, or want some that will not go bad any where near as fast, get dry calcium hypochlorite [Ca(ClO)2]. You should be able to get it from nearly any swimming pool or spa provider or a specialty chemical house. Swimming pool chemical providers often sell it labeled as HTH (for "high-test hypochlorite") or ?pool shock.? Make sure you are getting pure calcium hypochlorite with nothing else added, i.e. no anti-fungals or clarifiers, etc.
Pure calcium hypochlorite provides a minimum of 65% available chlorine. Calcium Hypochlorite is not hygroscopic (does not attract water), is practically clear in a water solution, and is a stable chlorine carrier. It is rarely available in small quantities so transfer it into smaller 1 lb plastic containers that can be tightly sealed. BE SURE TO CAREFULLY READ AND FOLLOW ALL HANDLING DIRECTIONS AND HEED ALL WARNINGS. It is always a good idea to be using calcium hypochlorite in an EXTREMELY well ventilated area, (i.e.OUTSIDE!). If calcium hypochlorite becomes contaminated by foreign substances it can cause combustion. Do not breathe the dust or get it in your eyes. This stuff is not Play Dough.
For granular calcium hypochlorite, 1oz = 50ml = 10.1 teaspoons
To treat clear raw water with 65-70% calcium hypochlorite there are a couple of ways to do it. If you want to directly treat the water with calcium hypochlorite use the following:
1 Gallon: add one grain, about the size of the period at the end of this sentence.
55 Gallons: add 1/8 teaspoon for a 5ppm solution.
400 Gallons: add 1 level teaspoon for a 5ppm solution.
To make a 5% chlorine solution to be able to use the drop method for disinfecting water, add and dissolve add ? teaspoon of 65-70% calcium hypochlorite to ? cup of water. This will decay at the same rate of purchased 5.25% bleach so don?t make more than you will use in a fairly short time.
Here is a detailed conversion chart for using calcium hypochlorite.
http://chppm-www.apgea.army.mil/documents/ChlorineDosing(fromDraftTBMED577).pdf
Remember, you want a residual, after treating, concentration of about 0.5 ppm so get some pdp test material.
Get a plastic ? teaspoon and 1 pint ? 1 qt plastic bottle and store with your calcium hypochlorite.
1 pound of calcium chloride will treat about 65,000 gallons of water at an initial 5 ppm concentration.
Calcium hypochlorite has the major benefit of extended shelf life. Providing it is kept dry, cool and in an airtight container, it may be stored up to 10 years with minimal degradation. If you want to keep chlorine in larger quantities or for a long time, this is the item to store.
All this and more in my (free and I'm not selling anything) Water Report ~95 pages. Send me an e-mail (pfwag@lycos.com) if you want a copy.
The info on chlorine is mostly right. Depending on who you check with the answer is all over the place. As an example:
For the standard 5.25% concentration of liquid bleach, to treat a gallon of ?clean? water, the Red Cross says to use 15 drops, the South Dakota Dept. of Environment and Natural Resources says 3, LSU and North Carolina U. say 16, the US Army says 1-2, Ohio State University says 5, the EPA says, 8-10, and 8/40. The City of North Miami says 16, and FEMA is all over the place. Tracing it back to the most popular source, Clorox says to use ?? capful (1 teaspoon)? and doesn?t mention the number of drops, although it would be far more than 16. Further complicating the issue is exactly how many drops are in a teaspoon? This is important to know when treating larger quantities of water.
Basically, the reason for this is because most emergency preparedness sources recommend using a fairly high concentration of chlorine either because they assume a user doesn?t knows what the actual chlorine content of the bleach is, doesn?t know the relationship between concentration and exposure time, doesn?t know the relationship between exposure time and water temperature, can?t count, or figure it is better to be safe than sorry. Or maybe they don?t know how many drops are in a teaspoon and assume nobody else does either. Also, there is about a 16:1 range for the amount of chlorine in municipal water.
Since there were some questions on Calcium Hypochlorite, here is the info:
Calcium Hypochlorite
Should you want a lot of chlorine based product, or want some that will not go bad any where near as fast, get dry calcium hypochlorite [Ca(ClO)2]. You should be able to get it from nearly any swimming pool or spa provider or a specialty chemical house. Swimming pool chemical providers often sell it labeled as HTH (for "high-test hypochlorite") or ?pool shock.? Make sure you are getting pure calcium hypochlorite with nothing else added, i.e. no anti-fungals or clarifiers, etc.
Pure calcium hypochlorite provides a minimum of 65% available chlorine. Calcium Hypochlorite is not hygroscopic (does not attract water), is practically clear in a water solution, and is a stable chlorine carrier. It is rarely available in small quantities so transfer it into smaller 1 lb plastic containers that can be tightly sealed. BE SURE TO CAREFULLY READ AND FOLLOW ALL HANDLING DIRECTIONS AND HEED ALL WARNINGS. It is always a good idea to be using calcium hypochlorite in an EXTREMELY well ventilated area, (i.e.OUTSIDE!). If calcium hypochlorite becomes contaminated by foreign substances it can cause combustion. Do not breathe the dust or get it in your eyes. This stuff is not Play Dough.
For granular calcium hypochlorite, 1oz = 50ml = 10.1 teaspoons
To treat clear raw water with 65-70% calcium hypochlorite there are a couple of ways to do it. If you want to directly treat the water with calcium hypochlorite use the following:
1 Gallon: add one grain, about the size of the period at the end of this sentence.
55 Gallons: add 1/8 teaspoon for a 5ppm solution.
400 Gallons: add 1 level teaspoon for a 5ppm solution.
To make a 5% chlorine solution to be able to use the drop method for disinfecting water, add and dissolve add ? teaspoon of 65-70% calcium hypochlorite to ? cup of water. This will decay at the same rate of purchased 5.25% bleach so don?t make more than you will use in a fairly short time.
Here is a detailed conversion chart for using calcium hypochlorite.
http://chppm-www.apgea.army.mil/documents/ChlorineDosing(fromDraftTBMED577).pdf
Remember, you want a residual, after treating, concentration of about 0.5 ppm so get some pdp test material.
Get a plastic ? teaspoon and 1 pint ? 1 qt plastic bottle and store with your calcium hypochlorite.
1 pound of calcium chloride will treat about 65,000 gallons of water at an initial 5 ppm concentration.
Calcium hypochlorite has the major benefit of extended shelf life. Providing it is kept dry, cool and in an airtight container, it may be stored up to 10 years with minimal degradation. If you want to keep chlorine in larger quantities or for a long time, this is the item to store.
All this and more in my (free and I'm not selling anything) Water Report ~95 pages. Send me an e-mail (pfwag@lycos.com) if you want a copy.